Showing posts with label Revit how to. Show all posts

Tuesday, August 06, 2013

Get your views in order – Project Browser

This is going to be obvious to existing Reviteers & Revit implementers, but getting your views organised & configured within your project browser as part of your implementation is an essential. Just accepting the out of the box View setup holds little value. Whilst there are no exact answers to how you should organise your views, typically this should be based on your modelling / documentation process. You should spend time discussing with your teams how you/they want the browser configured. Avoid long debates, as this is not productive, but engaging the teams as part of the process is certainly worth doing.

image

You may end up with a number of different configurations, which is what I had when when I worked at HOK. What I would say, is once you have it setup, train your teams in its use. Recently where I have been helping firms to implement Revit, we like to use their template as part of the training. This way they know no difference, for them its just the way they have to work.

image

The process of configurations is actually very straight to do. I like to follow a BS.1192 methodology, whilst not exactly matching this standard, it does at least start to help you structure the browser in a fashion. So my advice to firms is to work on the principle that you start at the top of the browser with WIP or work in progress, then you have PUBLISHED, these are the views that go on sheets. Then finally you have the actually sheets with the views placed on them. So progressing down the browser. Now you can also add in other groups as well such as EXPORT or COORDINATION, but in this example tutorial we will just limit the browser structure to WIP & PUBLISHED. I hope you find it useful.

Thursday, July 18, 2013

Modelling Best practise tip – part 2

As noted by Jay Zallan on twitter, my previous post actually didn’t provide an exact answer, but in many ways that was the reason for the post, remember the skin a cat part?. :-) But what Jay did do was start a debate about potential ways to solve this issue & this crowd sourced a great discussion, so thank you Jay. I always liked to be challenged, as whilst I have knowledge in the use of Revit (hopefully) there are many ways to do things & I love to capture everybody's thoughts, one of the beauties of twitter & social media. So the conclusion from the debate was as follows & btw I am not taking credit for this. This goes to all those that challenged the post I made; they are the real hero's here.:-

  • Edit sketch profile is bad, causes too many down stream issues; probably very true in many cases. but not all situation. Use with care.
  • Whilst the 4 wall solution provided an answer, its was probably not the best configuration. Instead model the walls as indicated below. Thanks to Robert Manna for this suggestion. This approach not only provides good wall clean ups, it ensures quality IFC exports.

image

  • Wall joins from the wall configuration above…nice clean ups.

image

As a test & thanks for Rob at BondBryan for this, if you IFC this configuration from Revit, whilst you end up with 4 walls, when you IFC the result back into Revit, the model comes back perfect. Even the wall joins are good,

image

Using edit wall profile, IFC the walls, its fine in an IFC viewer, but re-import into Revit & you get a real mess. I would guess its the same for any other <insert preferred BIM application here>.

Hopefully this crowd sourced information will be useful to you, but even the, remember that cat, as it probably needs a new skin.

Modelling Best practise tip

One of the most interesting aspects of using Revit for model authoring is often there is more than one way to skin a cat. Let me provide you with an example. Take a look at the image below.

image

You will notice, in principle both wall junction configurations look the same. The end modelling result graphically provides what you need, yet one solution is made up of 3 walls, the other 4 walls. I see this type of thing all the time with new users, even though they are educated in the deep capabilities of walls.

image

You might argue that it makes little difference, but from a purist modelling / downstream use of the model, I believe it does make a difference. This was no fault of the user who modelled it (btw this example was taken from a model I was auditing). He or she maybe under pressure & they did what they needed to do to get the information out of the door. But this highlights a big challenge that the industry has, what is best practise? I’m a firm believer that you should model how you would build it, whether or not you do or don’t use the model for wider “BIM” uses. BY engraining this culture within your teams, when a project comes along where you really have to deliver Level 2 BIM, (ie. a collaborate project where all disciplines are sharing their models) you will be a far better position to ensure that things are done correctly.

Friday, November 16, 2012

Can’t schedule wall level constraint

One really annoying thing you can’t do in Revit is the ability to schedule a wall & know its wall constraint. What is more frustrating is that the wall constraint is exposed in the API, so tools like Ideate BIM link will allow you to pick up the constrain & schedule this.

image

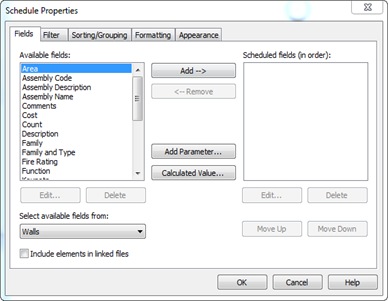
Manually, you can get around this by assigning a family parameter within the fields section of a wall schedule. Give it a name, something like “level location”. You will need to manually enter text by switching to a each plan view & select all instances of the wall type, or using the filter function to select all the walls across each view. It should not be too time consuming, but could be problematic with groups, but it does require you to follow the process carefully.

clip_image001

However,  with my good friend & colleague Don is cooking something up which should make this whole process a lot easier. When its ready we will let you know.

Friday, August 05, 2011

Revit 2012 – pebbles

Be sure to checkout Zach Kronz cool post of creating pebbles forms in either Revit or Vasari…..nice.

http://buildz.blogspot.com/2011/08/pebbles-bam-bam.html

image

Yep, that's right, this is Revit…..

Wednesday, July 27, 2011

Simply Complex Blog


image

After RTCUSA, Marcello Sgambelluri (he of Revit elephant fame) dropped me a note to say he has started a blog. He has started his blog site to be able to profile projects and Revit families that incorporate complex geometry. Be sure to check it out…

http://therevitcomplex.blogspot.com/

image

Tuesday, July 12, 2011

Revit 2012 - Reporting Parameters in CW Panels

I must admit, I don’t why I hadn’t picked up on this one before, but at RTC USA there was an interesting discussion that took place as well as being highlighted by Harlan Brumms in his class on solving common Autodesk Revit Architecture problems on using reporting parameters in curtain wall panel families.
This got me thinking, if reporting parameters can indeed be used in curtain wall panel families, they should be able to drive the depth of panels. If you can report the width & height of a panel, this will provide you with an area value. This could then be used in conditional formula which will parametrically alter the overall depth of individual panels.
For this exercise I started with a curtain wall panel.rft
image
Next I drew a very simple extrusion in the front elevation plan & locked the extrusion sketch to the reference planes.
image
I then dimensioned the vertical & horizontal reference plans. Its important you dimensions the reference plans & not the level embedded in the family.
image
Then select the horizontal dimension you just created & pick the label feature to turn the dimension into a parameter. Name the parameter to something like “width”, set it to an instance parameter & ensure you check the Report Parameter radio button.
image
Repeat what you did for the width parameter, turning the vertical dimension into a reporting parameter labelled as “height”.
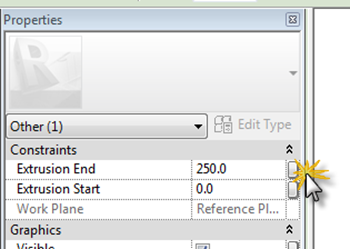
Go to the Ref. Level view, select the extrusion; in the Properties Palette, locate the Extrusion End parameter, hit the Associate Family Parameter button.
image
This will open up the Associate Family Parameter dialogue box. Hit the Add parameter button & create a new instance parameter called “depth”. This doesn’t need to be a reporting parameter.image
Go to the Family Types dialogue & create a new Area parameter as a instance.image
Go back to the Family Types dialogue box & do the following; in the formula for the Area parameter we will multiply the width X height to give us our Area.
image
Next we will add a conditional formula to the depth parameter. So we will use this formula as a test example.
if(area < 4 m², 1200 mm, if(area < 6 m², 600 mm, 100 mm))
What this conditional parameter will do formula is allow the depth of the panel to change based on the resulting area value of the panel. If is less the 4m squared it will be 1200mm thick, less the 6m & it will be 600mm, else it will be 100mm thick,
image
Next save your panel family with a suitable name. Start a new project, load your newly created panel family into the new project. Using the wall tool draw a straight segment of curtain wall. With the curtain wall selected, go to the Properties Palette, pick the Edit Type button, this will open up the Types Dialogue box for the Curtain Wall.
image
Set the Curtain Panel to your new loaded curtain wall panel. The cw system will automatically file with the new panel. Finally, using the Curtain Grid tool, start to divide up the curtain wall.
image
As you divide the curtain wall, depending on the panel size, the area of the panel will be calculated in turn informing the depth of the panels.
image
image
The values I added to the conditional formula are not cast in stone, you can easily modify them to get different results or even make a more complex  conditional formula. I have quickly knocked up a youTube Video which supports the above workflow, although I don’t follow it from start to finish, but it should reinforce what I did.

Friday, March 04, 2011

Nesting Generic models into Curtain Pattern Based Families

This comes from a query I received recently and also extends back a few years ago; since I came up with a similar challenge creating a curtain wall system for a proof of concept project I had to do when I worked for Excitech. This really will scare the BIM purist, but it may be useful. :-)image

In the example above I have used a generic model family and nested this into a curtain wall pattern based family, which in turn is loaded into a divided surface. If you build the generic model in Revit, this principle will work in Vasari as well. image

What is interesting about this is you can pull points and edges of the divided surface and the panels will cut back.

image

This may be useful when you having to quickly produce a concept study and find it quick to build old school geometry rather than work with points and reference lines to build the panel.

generic model nested into a pattern based cw panel

Monday, February 28, 2011

Vasari – louvered façade

Ok, apologies, but it has been a number of few weeks since I have posted anything! Things are picking up here in London so I have been really busy, but this is really not an excuse! Anyway, I thought I’d pass this little modelling tip on to you. Somebody in the office asked me a a few weeks back whether it was possible to create a parametric louver system which could be used on a facade for a freeform building they where working on.image

The louvers needed to be parametric so that they could adjust the angle of the louvers as and when required, to meet the environmental conditions. image

So I knocked this solution up with the user sat at my desk inside 10 minutes using a combination of points, nested adaptive components and curtain wall pattern based families. The original example was completed in Revit Architecture 2011, but the youtube video was done in Vasari 1.1. Sorry, there is no sound / voice over, but hopefully I have done the exercise slow enough for you to follow along!

Tuesday, December 21, 2010

AU2010 – adaptive component exercise

adaptive component


I thought I’d run through the adaptive component exercise that James Van and I planned to show at AU2010. This exercise can be completed in either Revit 2011 or Vasari. The 60 minute class really didn’t provide enough time for us to go through this particular example, which I am sure was very annoying for the audience. Lets hope that the AU organisers listen to the feedback and return the class schedules back to 90 minutes for AU2011. However, in the meantime I hope you find this useful.

Monday, September 20, 2010

Back to Basics – Conceptual Masses in Revit 2011

image

I am still surprised by the amount of questions and queries I get from users who are trying / starting to use Revit’s conceptual massing tools in either RAC 2010 or RAC 2011. The most common queries relate to how you actually create a particular form. I am suppose pre 2010 it was straight forward as we had extrude, revolve, sweep, blend and swept blend. The way you used these form making tools was very explicit; need to create an extruded form? Then use the extrude tool. Revit 2010 changed all that with a far more flexible approach to form making, but to some extent it tossed away the rule book and I believe that is what has confused some users. If you don’t do a lot of massing in Revit, this new paradigm can also lead to confusion and a certain amount of head banging!! I’ve had experienced Revit users get totally stumped when creating even the most basic forms. Once you understand the behaviour and the philosophy to form making, creating complex forms gets a lot easier.

So it made sense to create a series of short videos which explained how to create some common forms in Revits conceptual design environment. Experienced users who use the tools will know all this, but for those that don’t, I hope this is of assistance. I have deliberately avoided any voice over, so you force yourself to review the tools and commands being picked. It is all about creating the forms and I deliberately does not delved into model lines versus reference lines, pure geometry only. I am sure there are many ways to create some of these forms, but these in my view these are the most obvious steps.

You will find videos which you how to…..

  • Extrude
  • Revolve
  • Blend
  • Sweep
  • Swept Blend
  • Cone
  • Dome
  • Sphere
  • Torus
  • Loft 1
  • Loft 2
  • Pyramid


1. Extrude


2. Revolve


3. Blend


4. Sweep


5. Swept Blend


6. Cone


7. Dome


8. Sphere


9. Torus


10. Loft 1


11. Loft 2


12. Pyramid

Sunday, May 16, 2010

Adapt your points of view – Revit 2011

A few years back when I worked for a well known UK reseller, a colleague and I put together a presentation to demonstrate how Inventor and Revit could work together. Part of this presentation showed how to model in Inventor and then pass the geometry to Revit as a SAT file for use within a Revit project. Of particular interest at the time was Inventors adaptive capabilities and we used these to great affect in a structural atrium support solution.

image

Whilst this was a virtual design concept, the original idea came about from a real project I had been involved in 12 years earlier with Househam Henderson Architects. This was for a TV company that were refurbishing a building, turning it into their new offices and studios in central London. The building being renovated had an enclosed court yard which was opened to the elements, but the plan was to enclose this courtyard with a glazed roof to form an atrium. This would provide a cafe and a social area for staff and visiting guests. One issue was that the new glazed roof would need supporting from the atrium floor level. 

1276_N11

So a structural tree support system was designed to support the roof. At the time this was modelled in AutoCAD release 13, yes you did read that right, that's how old the project is! The big challenge at the time was the scheme constantly changed as the designer and the structural engineer refined the concept further. Load distribution was a nightmare! My special thanks goes out to Househam Henderson for allowing me to use the image above.

So when I saw the new adaptive component family in Revit 2011, I immediately got excited as I remembered the modelling challenges I had encountered in the past. Whilst Inventors adaptive tools resolve the problem, I wanted to do this in Revit! :-)

image 

Understanding how the new adaptive points react and their various parameters is without doubt the key. This short video introduces you to the new adaptive family and demonstrates how to create a simple structural tree support. Hope this is useful…..