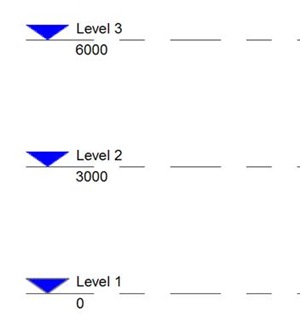
This query comes up on a regular basis; How do I display my levels at the correct above sea level? You may be mistaken to think that everything in the world of Revit is flat and new users often get confused by levels, thinking that they should actually move the levels vertically to the correct above sea site level. It is possible to do this, but what if you've started your project and only later do you get the correct survey information. The golden rule is never to move your project, in plan or vertically, I can assure you, Revit does not like this at all. So how do we solve this problem? Well we can setup levels to display the "Elevation base" as shared.
The principle is to move the coordinate system, but not the model, similar to sharing coordinates in plan. So to adjust the default project level of 0m to +16.400m you need to do the following.
Start by going to any elevation view and zooming into level 1 or level 0, depending on how your template defines the first level.
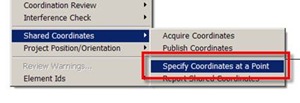
Next go to the tools pulldown menu and select shared coordinates > specify coordinates at a point.
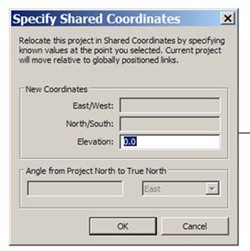
You will discover that you pointer will change to a target. Select your lowest level with the target. This will open up the following dialogue box.
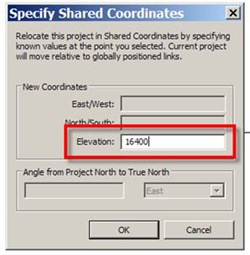
In the elevation field, type in the level you actually require. In this case 16400.
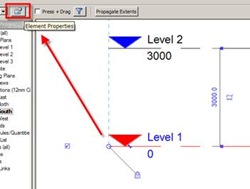
Once you’ve typed the value in, exit out of this dialogue. If you take a look at the levels, nothing seems to have changed. What we actually need to do is to get Revit to display the level as "shared" rather than "project" . To do this select level 1 and go to element properties.
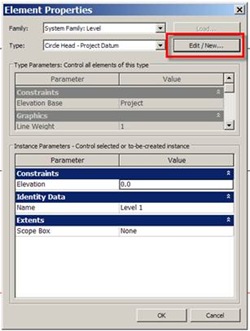
This will open up the element properties window. Click the edit/ new button…..
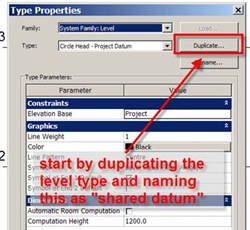
We will now create a new level type, which will allow us to display the elevation base units of shared rather than project. Start by duplicating the default level type and renaming this something like “shared datum”.
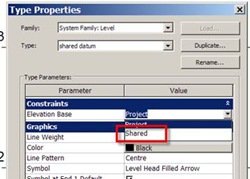
Next we will edit the new level type and change the Elevation Base from “project” to “shared”. Once you’ve done this click “apply” and exit out of the type properties dialogue, then exit out of the element properties dialogue.
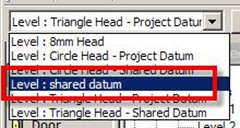
Finally, select all the levels in your elevation view, then go to the type properties drop down menu and select the previously created “shared datum” level type from the type selector.
Your project will now use the Shared datum level type with the elevation base set to “shared” and therefore all your levels will display the correct above seas level. You can easily swap back to the “project” level type by selecting the levels and using the previous level type which had its elevation base set to "project".
![clip_image001[4]](http://lh4.ggpht.com/davidwlight1969/SLb7orUfjpI/AAAAAAAAAr4/8RA-ri7C0SE/clip_image0014_thumb3.jpg?imgmax=800)
2 comments :
great tip! will this affect linked models? i mean all other models need to be fixed this way
what about:
Topography?
Annotation Spot Levels?
How do we change these in relation to new datum?
Tnx
Post a Comment